


Ink Jet Ceramic Printer Mirtels M101 with High-Precision Alignment System

Ink Jet Ceramic Printer Mirtels M101 with High-Precision Alignment System
The M101 is simply the best printer on the market for ceremonial photoceramics. It has a special attachment for ovals and tablets that provides hair-splitting accuracy in positioning the image.
The ceramic printer has a standard head-cartridge which you can buy in the supply section of any computer shop.
The M101 is reliable and easy-to-use.
Characteristics
| Max. paper size | 200 mm х 300 mm (7.9 x 11.8 inches) |
| Print method | Thermo-jet |
| Printer resolution | 4880 х 1200 dpi |
| Ink feed system | Refillable cartridges |
| Printing speed | 13 х 18 cm (5 x 7 inches), photo mode – 37 sec |
| Interface | USB |
| Printing direction | Duplex printing with logical search, optimized for text and graphic |
| Printer, capacity | 220 Volt, 10 W — printing, 1.5W — waiting mode |
| Printer driver | Win 98, 2000, Me, XP, Mac, Vista |
| Weight | 15 kg (33 lbs) |
| Ambient conditions | Temperature 10-40 degrees Celsius (50-104 degrees F) |
| Guarantee | 12 months guarantee including extended service |
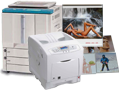
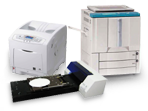
Required equipment for photoceramic printing:
- Ceramic printer, creating a sticky covering on a surface of a ceramic-metal (ceramics) by adhesive ink
- Muffle furnace (0-850 C, 32 -1562 F)
Needed supplies:
- A ceramic paint (four colors: cyan, magenta, yellow, black — CMYK)
- Adhesive ink
Printing is accomplished by following steps:
- Place the object (a ceramic-metal oval or the tablet) on the printer table.
- Print the image (a photo, a landscape, a picture, or text) on the computer, using the Photoshop application. In Photoshop, there is a function to separate the image into 4 colors (CMYK). The four versions of the image are printed separately. We choose the “cyan” image and send it to the printer.
- The ceramic printer prints the "cyan” picture adhesive (gluing) colorless ink. The printer table opens.
- After the table opens powder gets onto the "cyan” image. On those places where there is adhesive gluing ink – the powder sticks, there where there is no colorless adhesive ink, it doesn't stick. We use a wide brush on a surface of the image and clean the extra toner away. The small amount left is blown off. Now the cyan pigment is precisely on those places where it is printed by the adhesive colorless ink. The collected toner can be used repeatedly.
- In Photoshop we select the next color (“magenta”) and print out a «magenta» picture with the adhesive colorless ink. The printer table opens. We repeat the point 4 procedure.
For reception of a full-color photo on ceramics such operation is made 4 times.
You can see the partial technical process on video tape.
For reception of a black-and-white photo it is enough to put on monuments only black color.
After we have printed the last color, we remove an object from a table of the printer and place it in the furnace. After reaching a temperature of 800 degrees, the color pigment solidifies on the surface of the glaze, and we get a result with photographic quality.
This equipment for the photoceramics printer has the lowest cost price in comparison with all known technologies of photoceramics.